Location Changer LocSpoof (iOS App)
iRocket LocSpoof is a location changer that allows you to easily change your GPS location without rooting or jailbreaking your phone. Compatible with popular location-based apps like Pokémon GO, Find My, Life360, and Tinder, it makes location spoofing a breeze.
Get Started
Before you start changing your GPS location, it's essential to set things up properly. This section walks you through installing the iRocket LocSpoof iOS app and configuring your iOS device. Follow these steps to ensure a smooth start and unlock the full potential of your location changer!
Pre-installation Instructions:
- 1.Direct installation on iPhone is not available: LocSpoof iOS app cannot be directly installed on your iPhone. You need to install the LocSpoof Assistant program on your computer first, which will then help you install the LocSpoof iOS app on your iPhone.
- 2. System Requirements:
-LocSpoof iOS Assistant Win: Windows 7 - Windows 11
-LocSpoof iOS Assistant Mac: Mac OS 10.15 - Mac OS 15
-LocSpoof iOS App: iOS 13 - iOS 18 and above
1 Install LocSpoof iOS App

Note: Devices running iOS 18 and above need to enable Developer Mode on the iPhone following the prompts.
- Windows users might need to install Apple driver.
-Mac users might need to enter the computer password to grant permission.


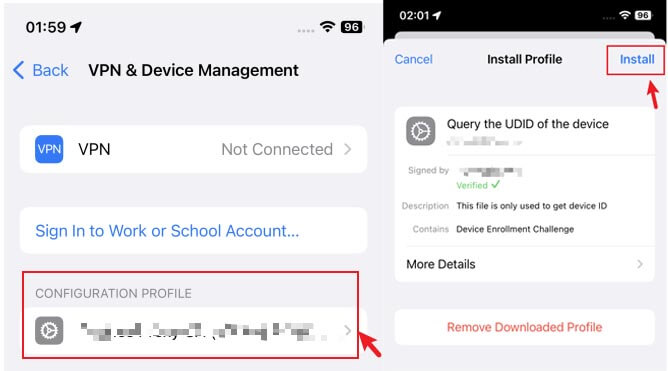
2 Configure VPN with iGoSpeed App


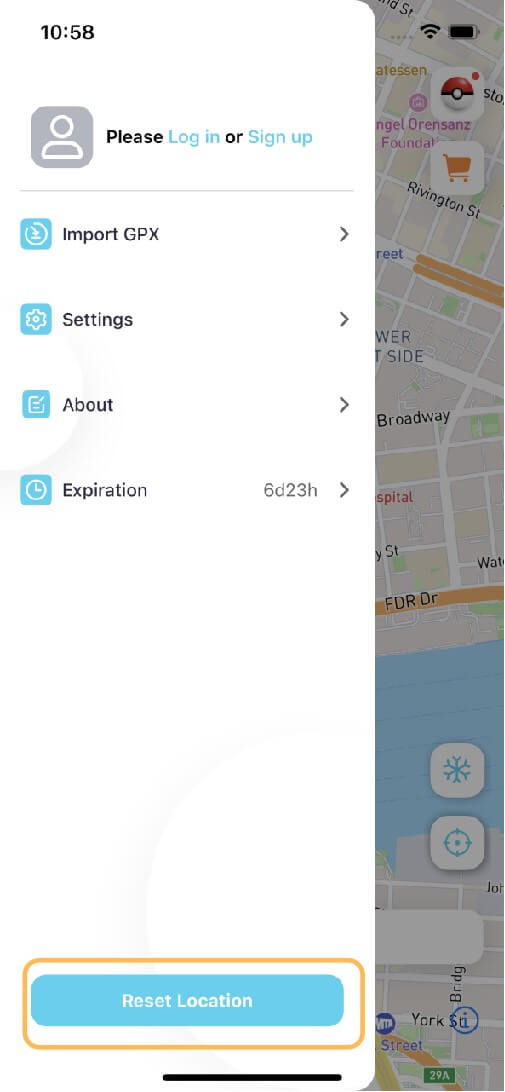
- The LocSpoof iOS app is valid for 7 days. To ensure uninterrupted use, reinstall the app before it expires.
You can check the remaining validity of the app through "Personal Center" > "Expiration Date."
Change Location
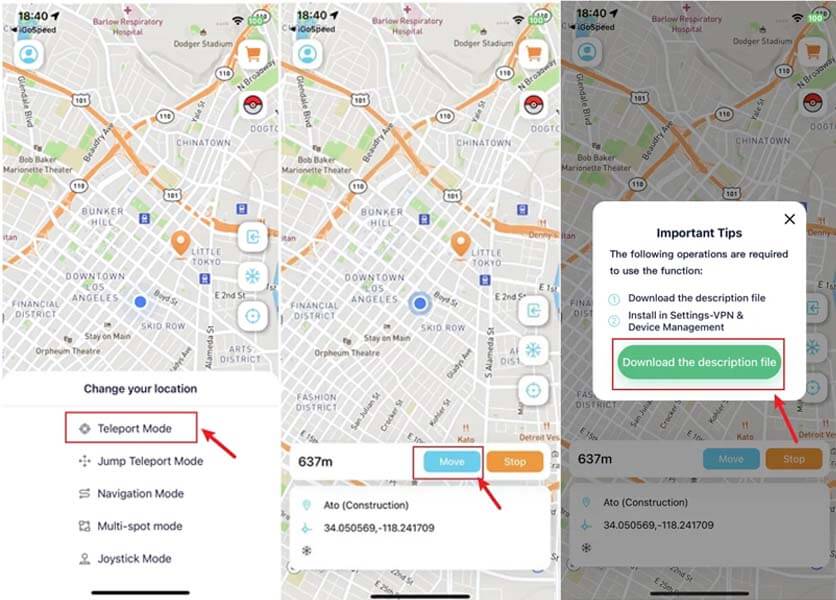
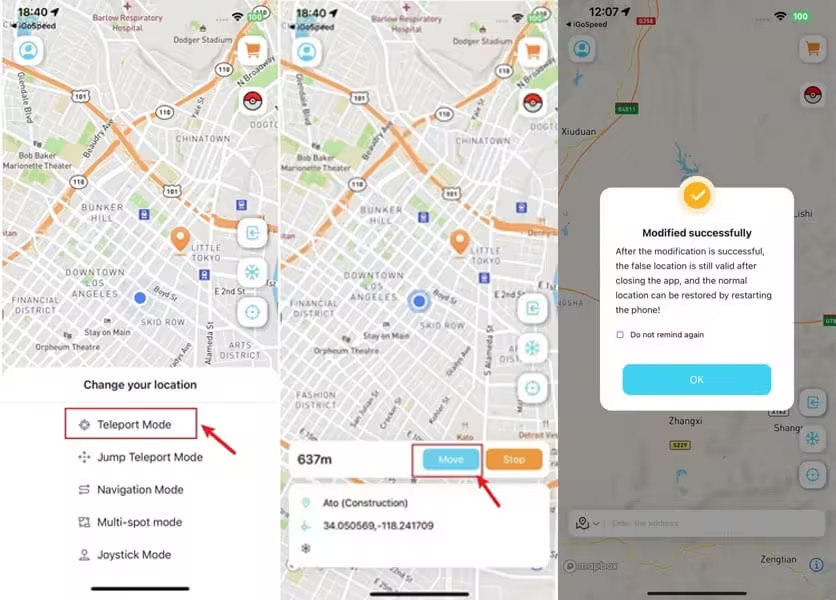
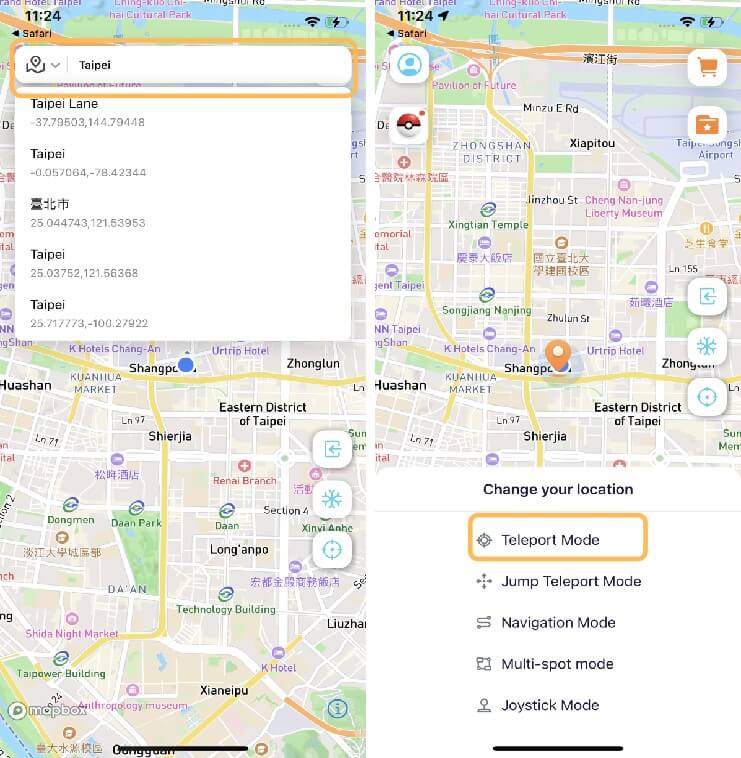
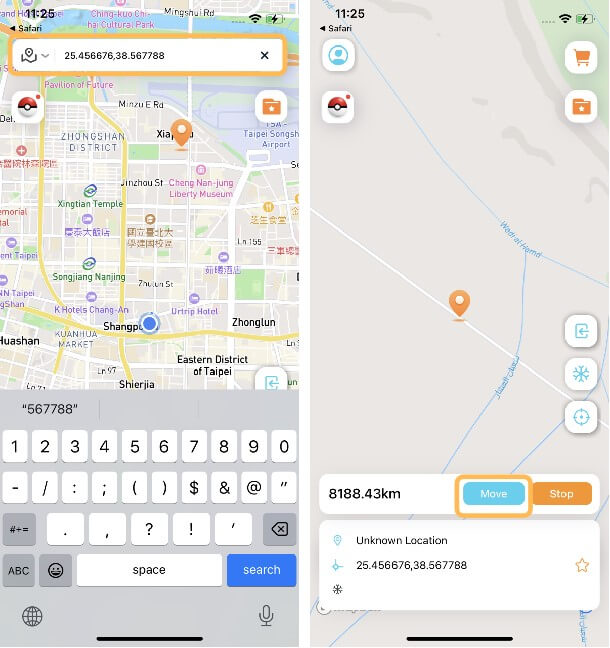
1 Teleport Mode
Teleport Mode moves your location instantly anywhere you want.
Method 1 Long-press on the map to select your desired location > Choose Teleport Mode.
Method 2 Enter an address in the search bar > Select your target location > Choose Teleport Mode.
Method 3 Enter coordinates in the search bar > Select your target location > Choose Teleport Mode to complete the modification.
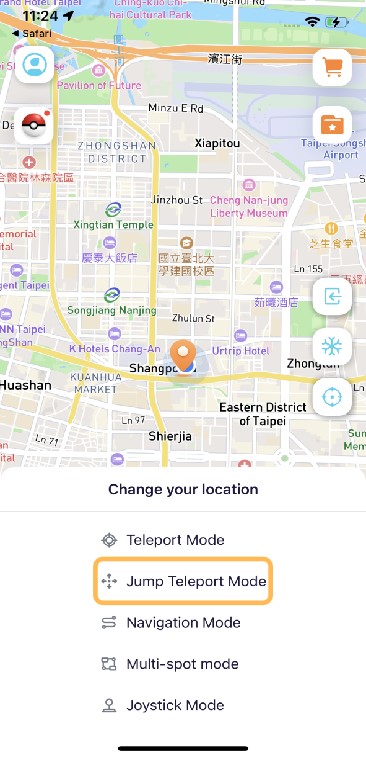
2 Jump Teleport Mode
Jump Teleport Mode allows you to teleport in sequence based on selected locations.
Select your desired location and long-press on the map to enable Jump Mode.
Long-press on the map to select multiple locations in the order you want to jump (You can use the left-side buttons to undo or clear selected locations.)
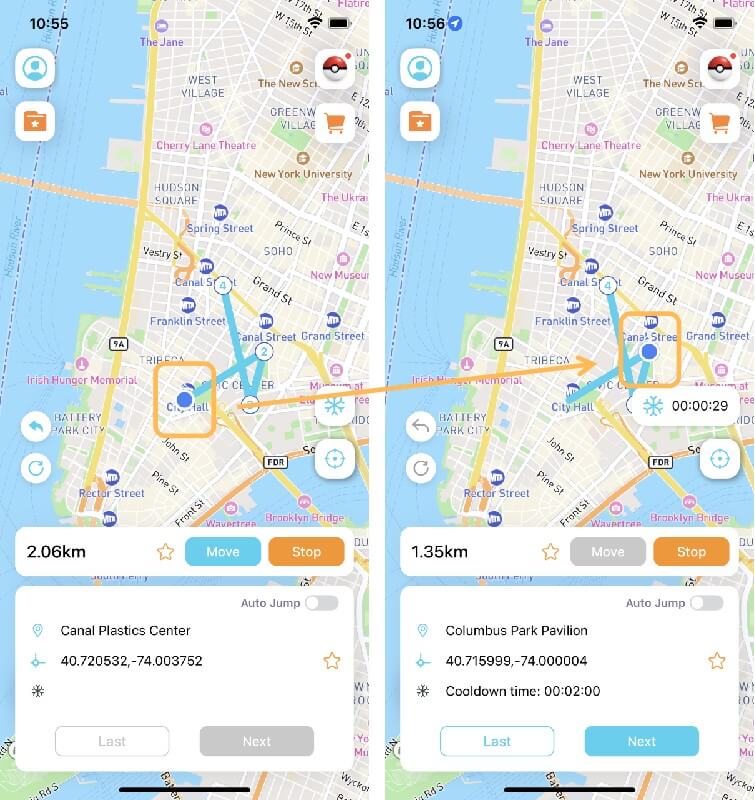
Choose your preferred jumping method:
- Manual Jump: Tap Move to instantly teleport to the next waypoint. Tap Next to proceed to the next location or Previous to return to the last one.
- Auto Jump: Once enabled, your location will automatically jump to the next waypoint after a cooldown timer (Cooldown Mode must be activated first).
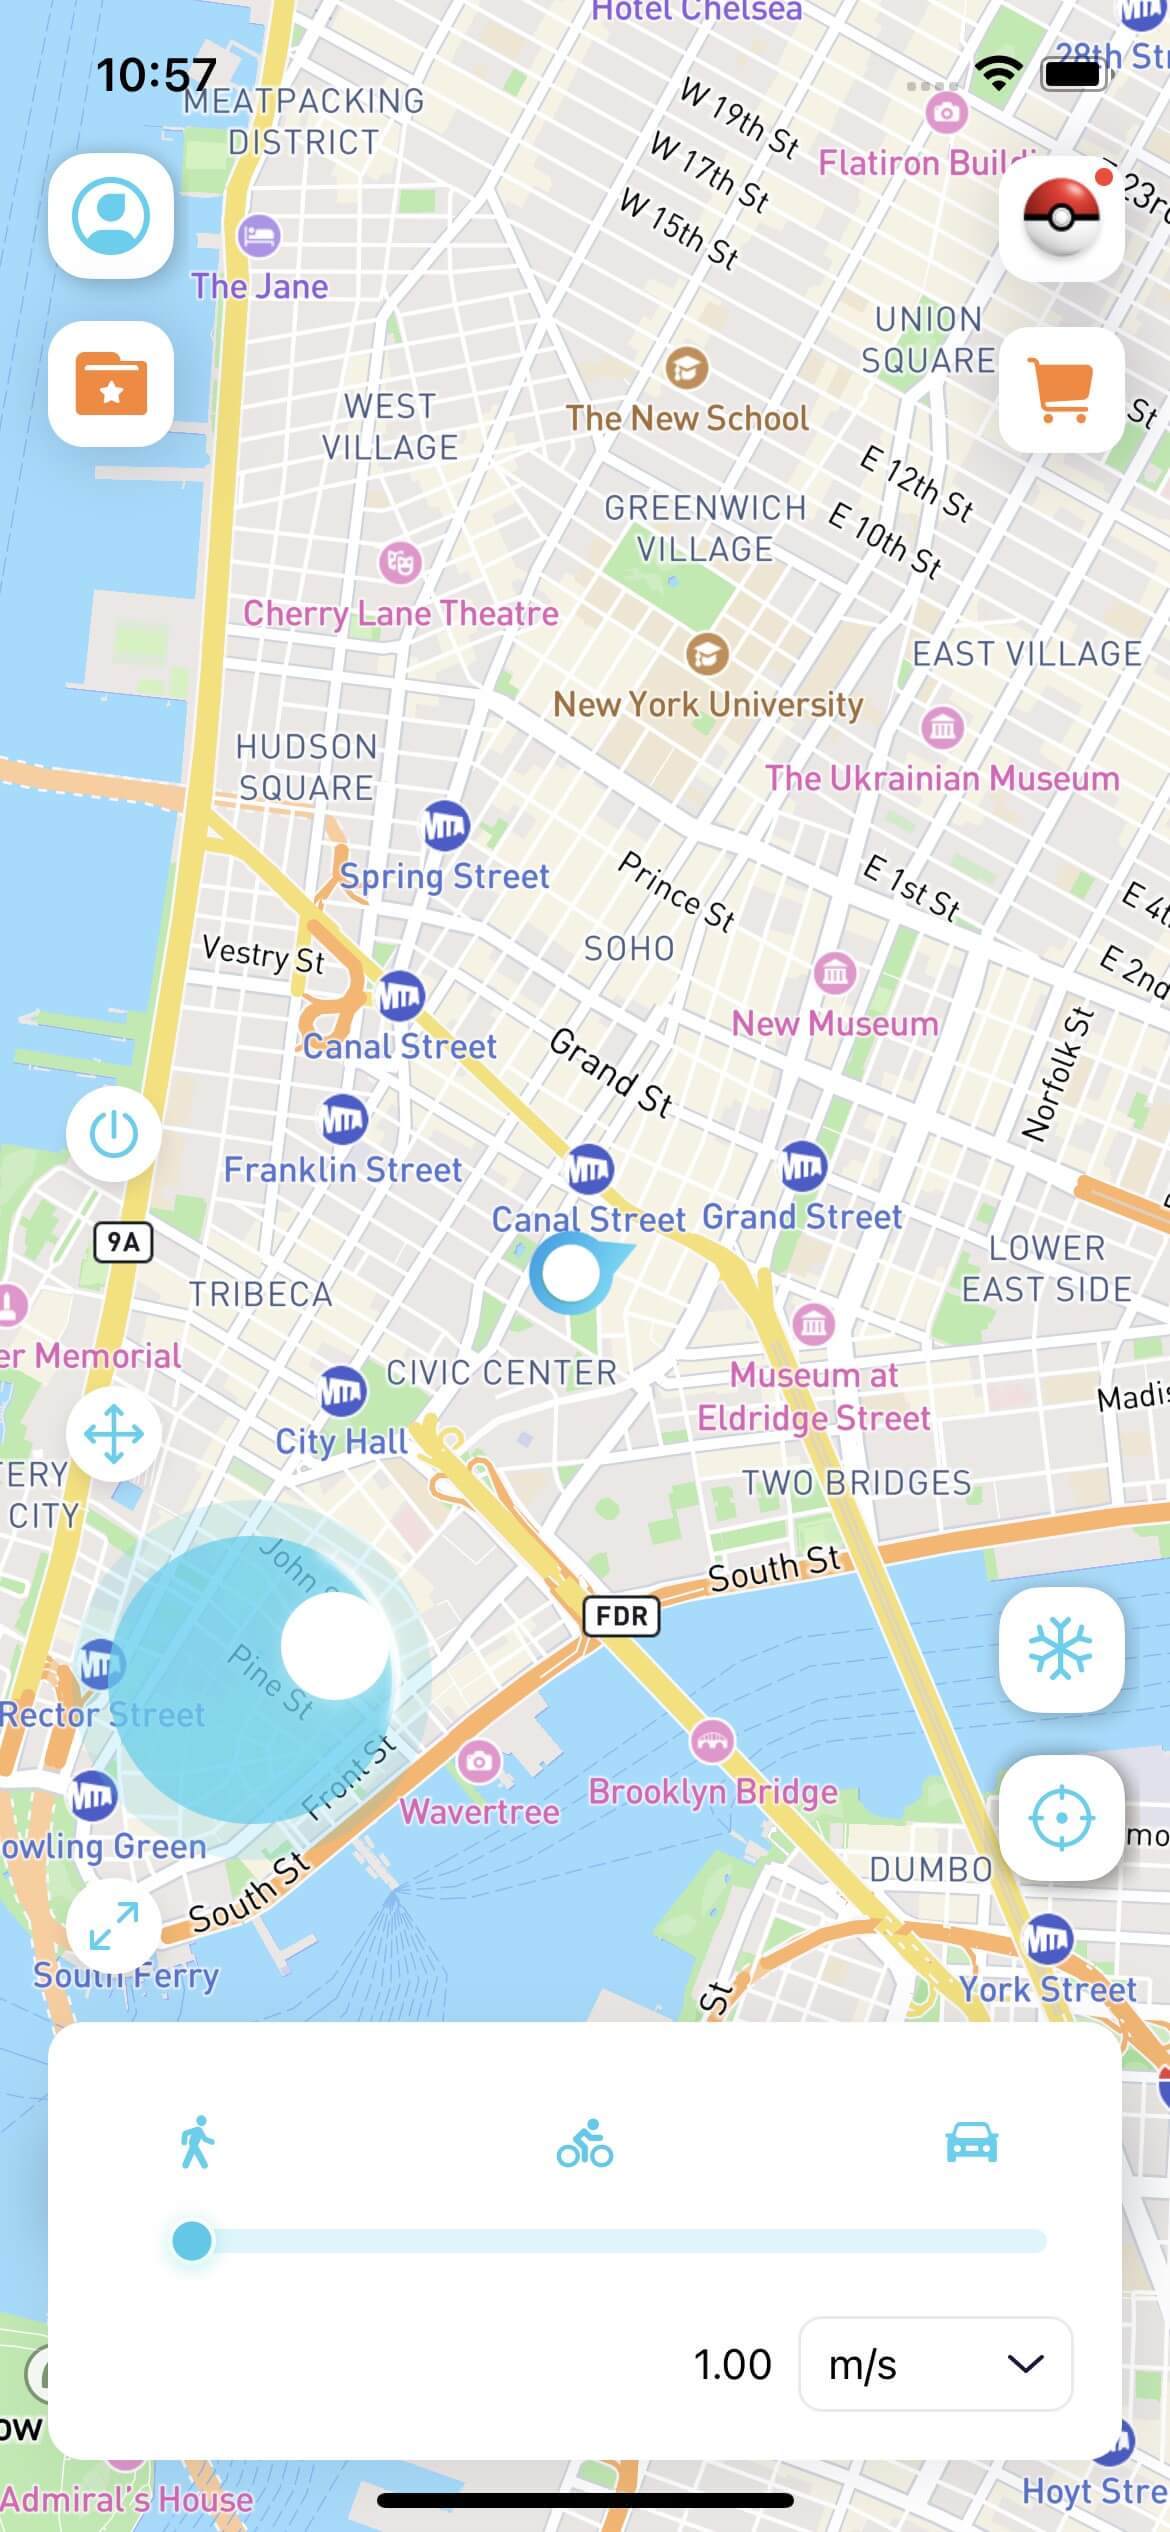
3 Navigation Mode
Navigation Mode lets you simulate movement based on your travel method.
Select your desired location and long-press on the map to enable Navigation Mode.
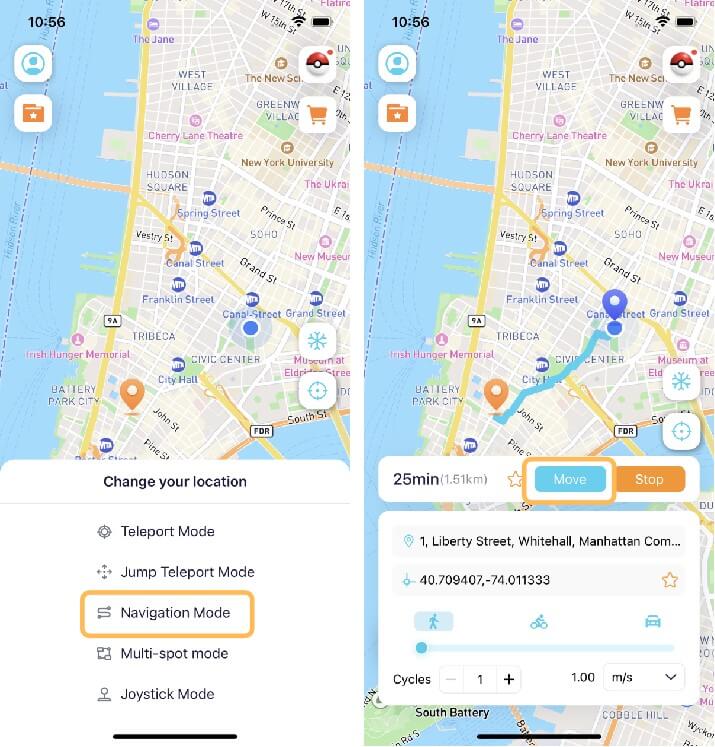
Note
1. You can switch between different travel modes to modify your route.
2. Adjust your movement speed by dragging the circular slider below the travel mode options.
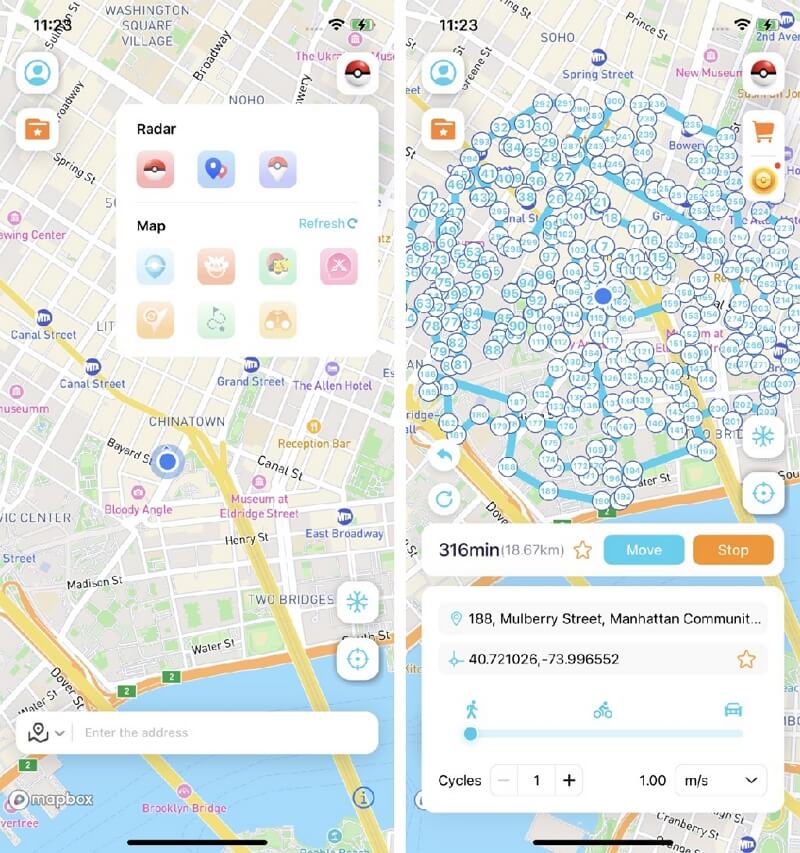
4 Multi-spot Mode
Multi-spot Mode lets you modify location based on selected route and travel mode.
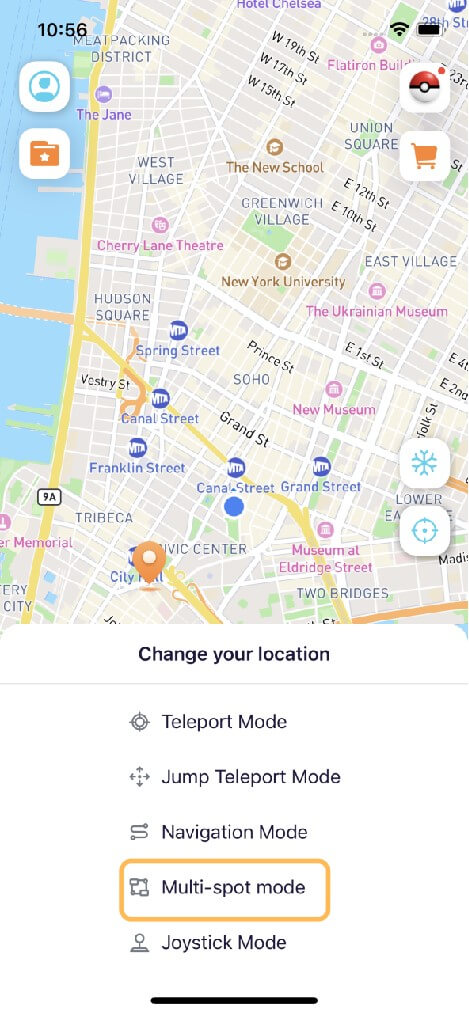
Long-press on the map to select multiple spots in the order you want to navigate.
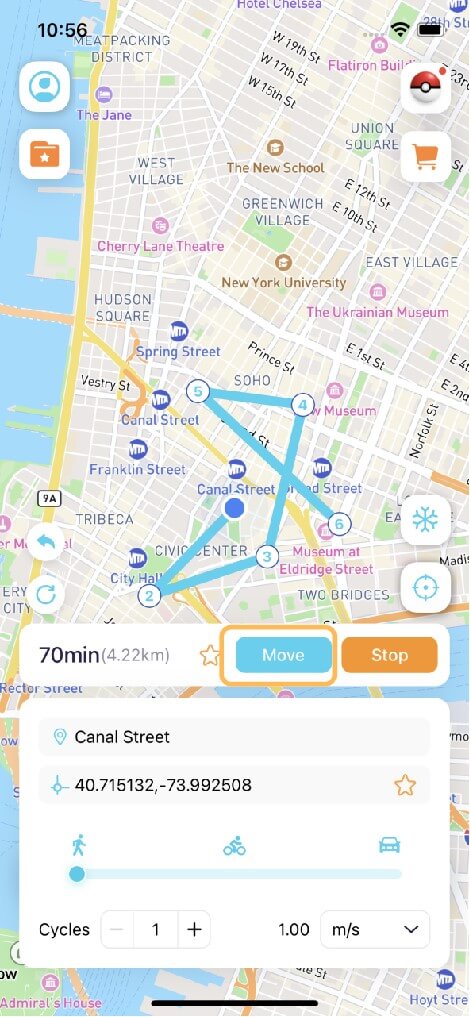
Note
1. Use the left-side buttons to undo or clear selected locations.
2. Adjust your movement speed by dragging the circular slider below the travel mode options.
1 Joystick Mode
Joystick Mode controls virtual movement with direction and speed
Select your desired location and long-press on the map to enable Joystick Mode.

Drag the center circle of the joystick to choose your movement direction and lock it in place.
Special Features
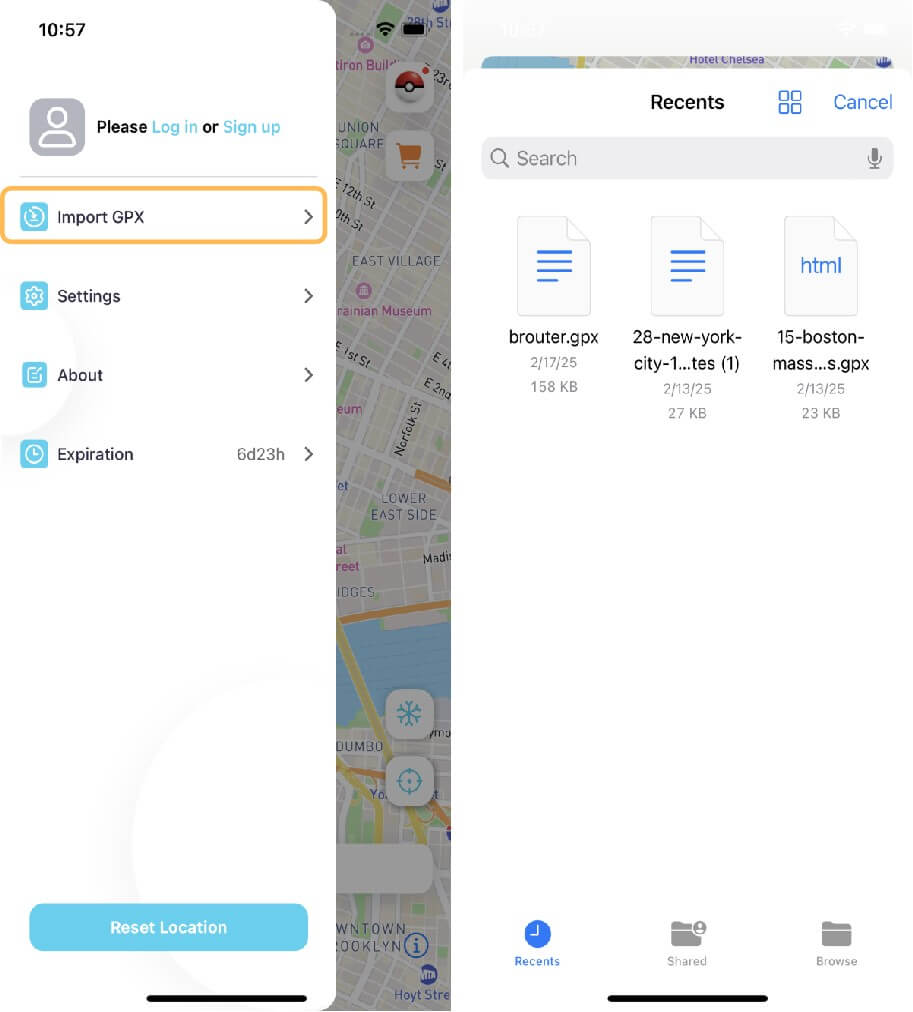
1 Import GPX Files
You can import your locally saved GPX files, and we will automatically recognize and match them to the corresponding mode.
- Tap Import GPX File and select a locally stored GPX file.
- The system will automatically recognize the route and match it with the appropriate mode.
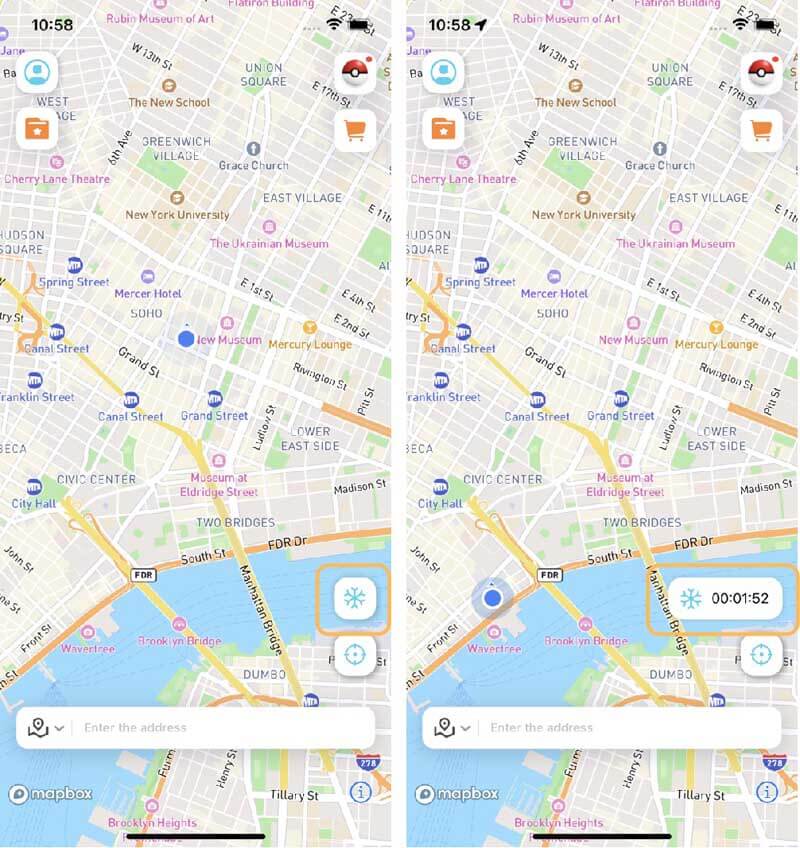
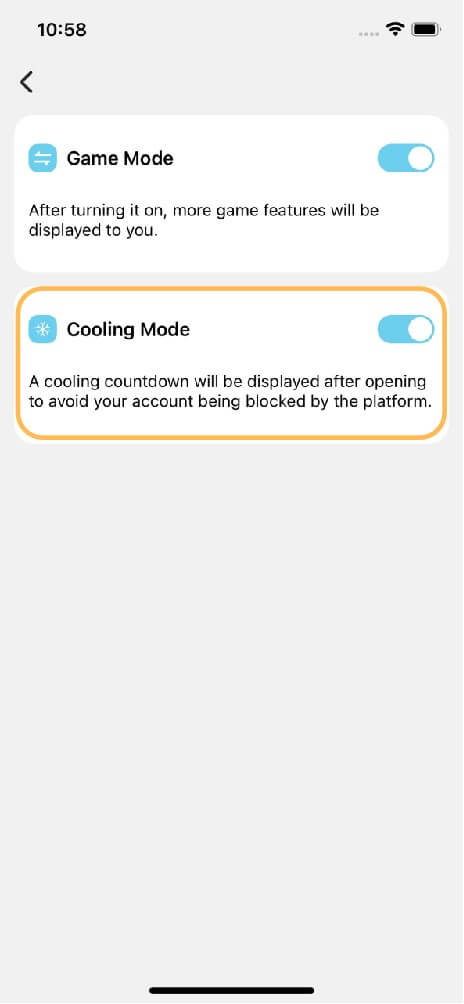
2 Cooldown Timer
The system will display the cooldown time based on the distance of your location change (Game users can follow the cooldown rules to avoid detection by the platform).
- Tap the Cooldown button on the home page to activate it. Once enabled, dynamic cooldown time will be displayed.
- If you don't want to see this mode, you can disable it in your profile settings.
3 Reset Location
You can tap the Restore Real Location button in your profile settings to return to your actual current location.
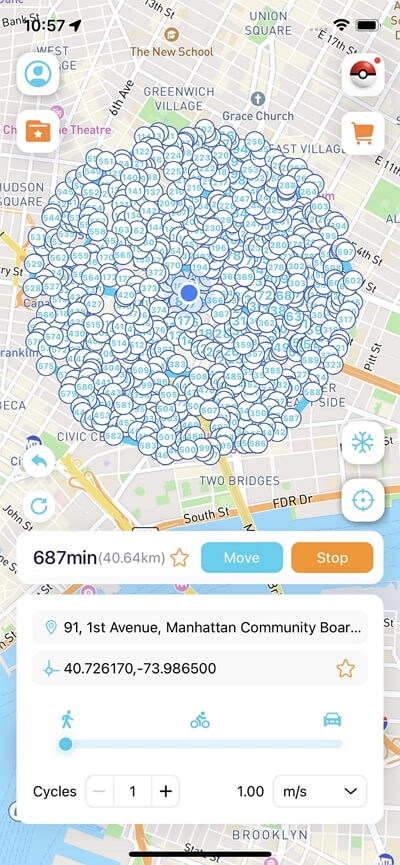
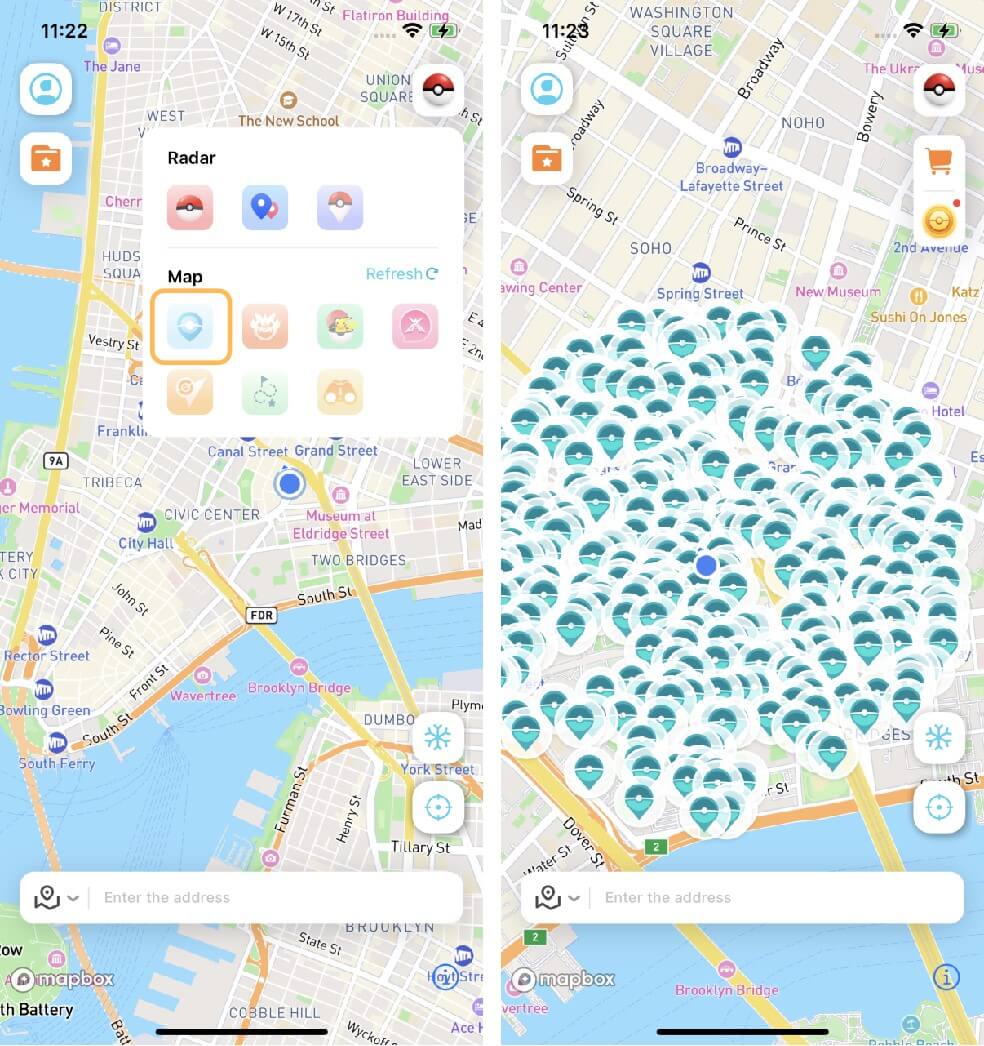
4 View Nearby PokéStop
Once activated, you will be able to see information about PokéStop within a 5km radius.
5 Pokédex
You can also view details about Pokémon and raids, and search for specific information.
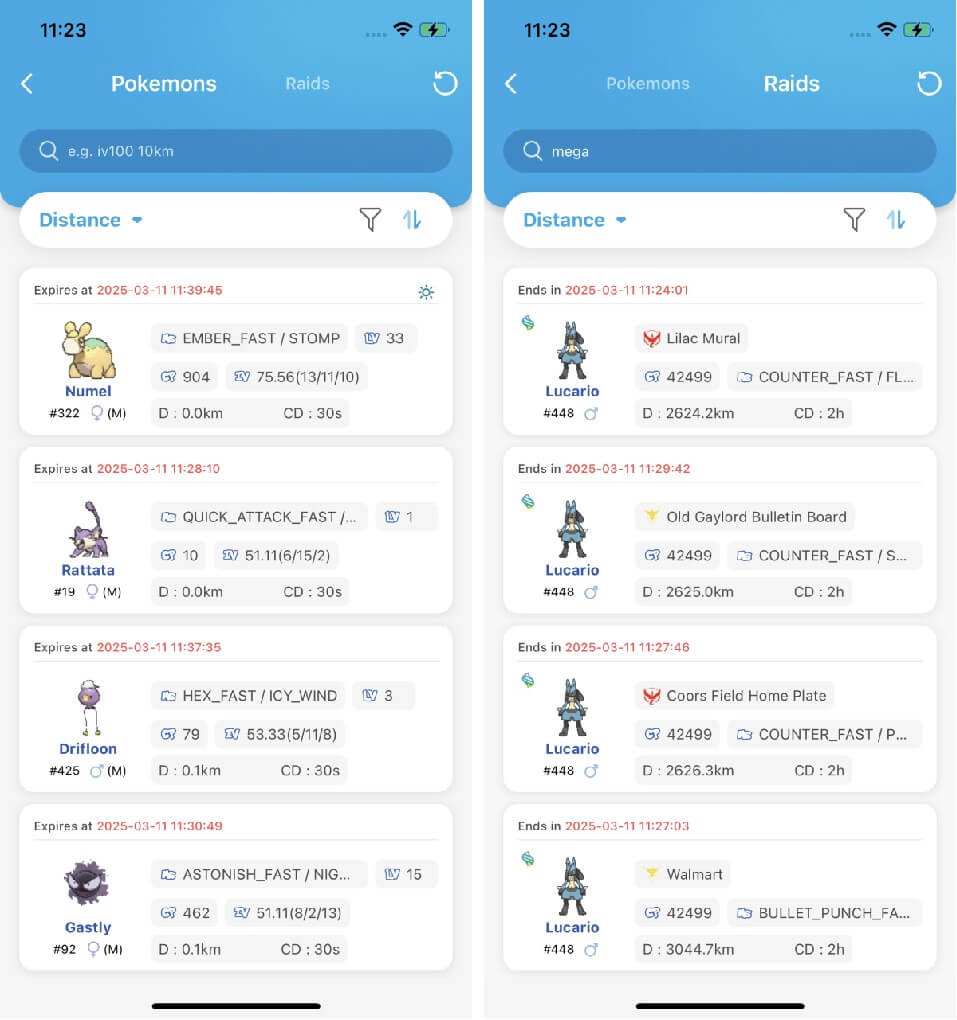
- The list by default displays the latest Pokémon or raid (hatched) data, sorted by distance.
- The search supports multi-condition queries, but conditions should be separated by a "space." For example: iv100 2000mi 096.
- If no distance is entered, the search will display Pokémon or raid data near your current location.
- Supported searches are as follows:
Pokemon Search
- Name: e.g. [pikachu] — Search for Pokémon named Pikachu (English only).
- PokemonID: e.g. [025] — Search for Pokémon with PokemonID 025.
- LatLon: e.g. [40.719989,-73.996789] — Search within a 10km radius of the specified coordinates. Add a distance condition for broader searches.
- IV: e.g. [iv100] — Search for Pokémon with an IV of 100 or higher.
- CP: e.g. [cp2000] — Search for Pokémon with a CP of 2000 or higher.
- Level: e.g. [lv30] — Search for Pokémon level 30 or higher.
- Gender: e.g. [female] — Search for female Pokémon (supports male, female, genderless).
- Boosted: e.g. [boosted] — Search for Pokémon with weather boost.
Raid Search
- PokemonID: e.g. [146] — Search for raids with Moltres as the raid boss.
- Name: e.g. [pelipper] — Search for raids with Pelipper as the raid boss (English only).
- Tier: e.g. [t5] — Search for Tier 5 raids.
- LatLon: e.g. [40.719989,-73.996789] — Search within a 10km radius of the specified coordinates. Add a distance condition for broader searches.
- Mega: e.g. [Mega] — Search for Mega raids.
- EX: e.g. [ex] — Search for EX raids.
- Hatched: e.g. [hatched] — Search for raids that have already hatched. To search for unhatched, use [egg].
- Boosted: e.g. [boosted] — Search for raids with weather boost.
6 Generate a Route Automatically
Once clicked, it will automatically generate a route to visit all the supply stations near you.
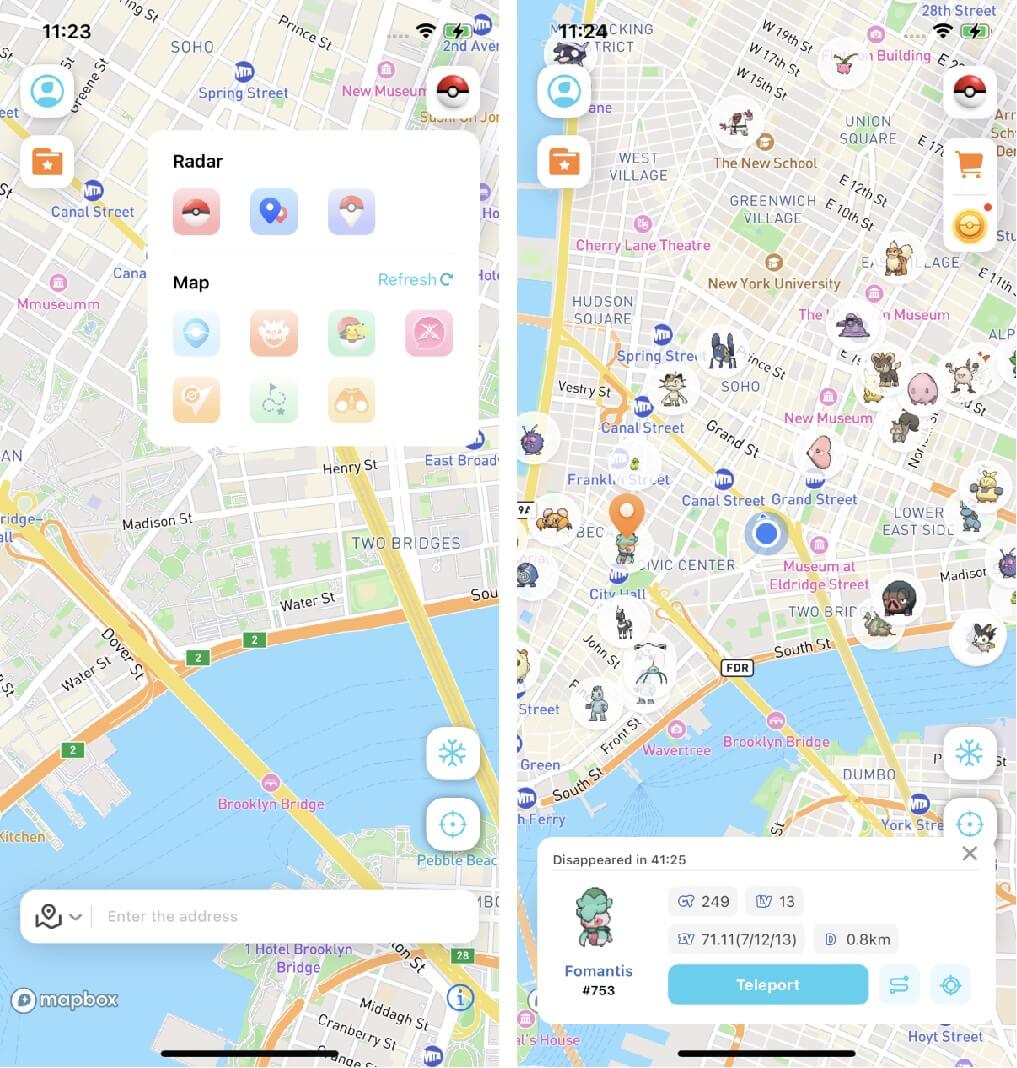
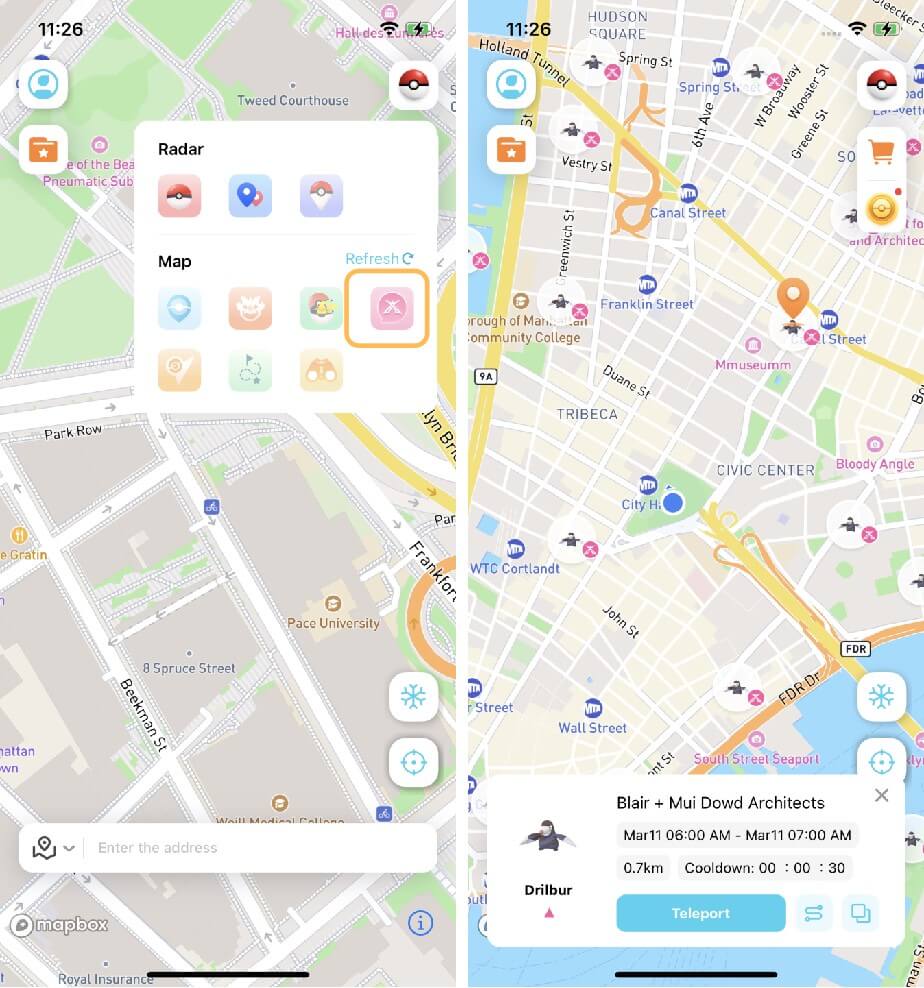
7 View Nearby Pokémon
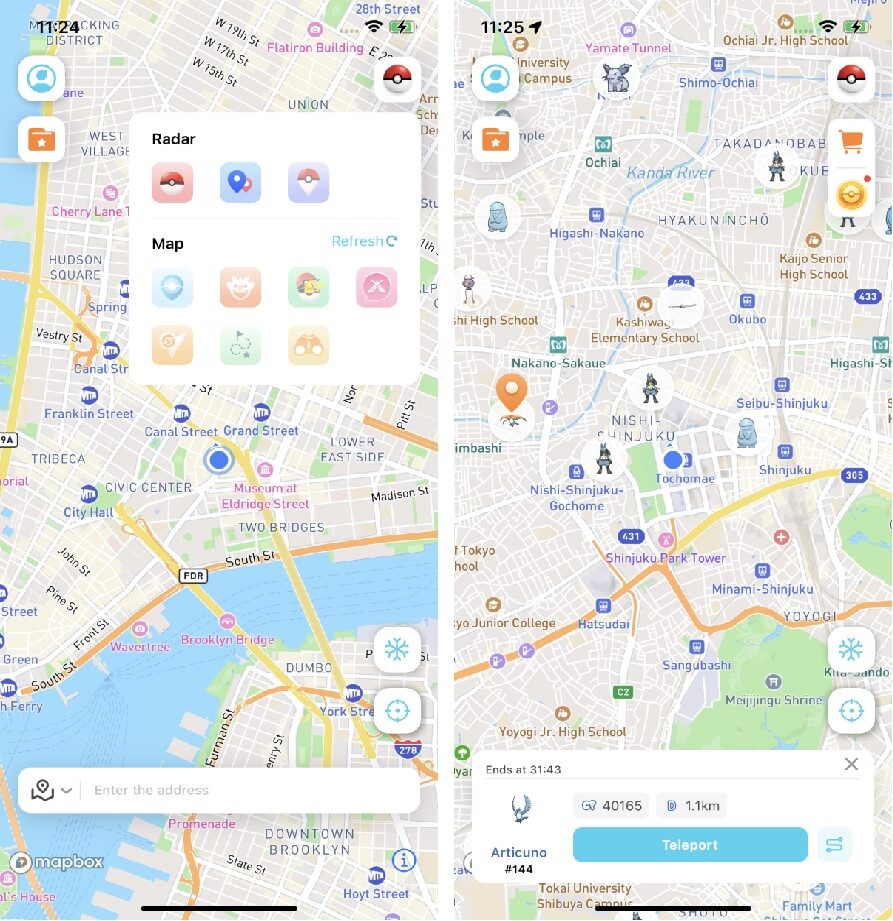
8 View Nearby Raids
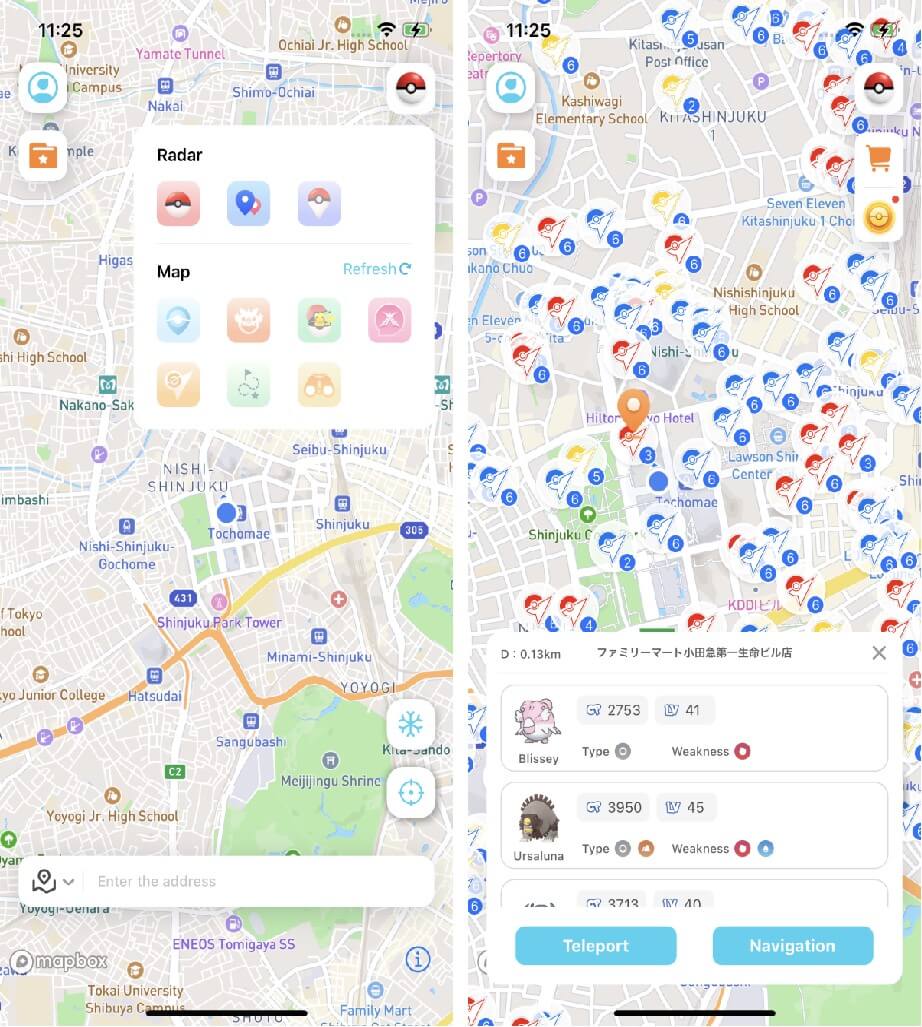
9 View Nearby Gyms
You can tap on a gym to view the Pokémon inside.
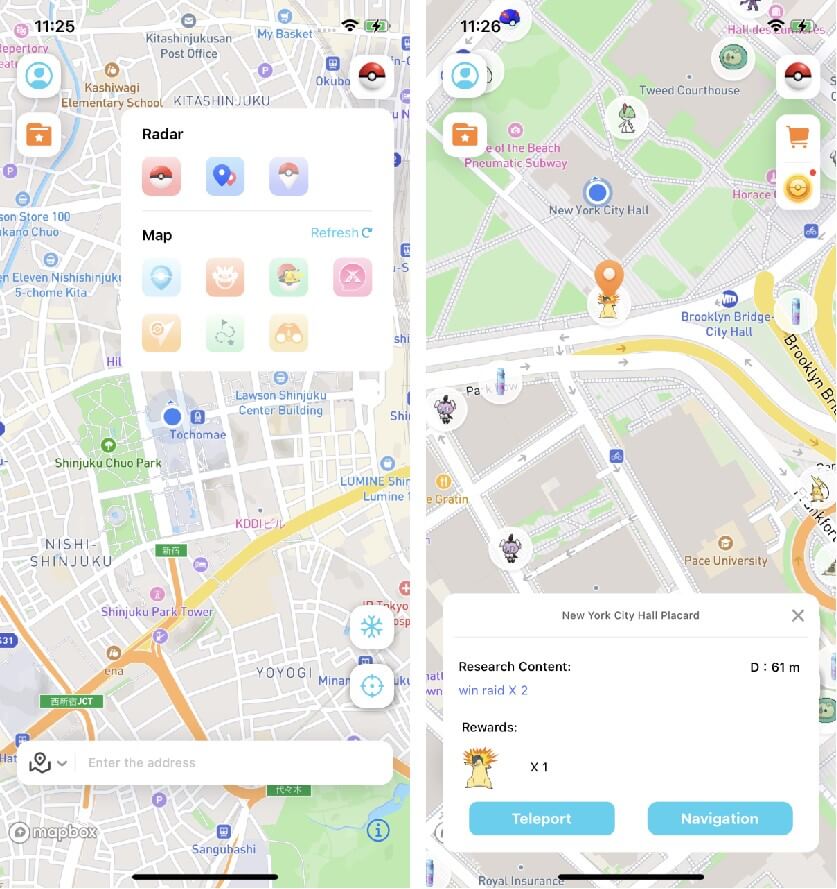
10 Research Task Information Search
You can tap on a task to see details and rewards.
11 View Nearby Gigantamax
You can tap on Dynamax to view details and boss information.
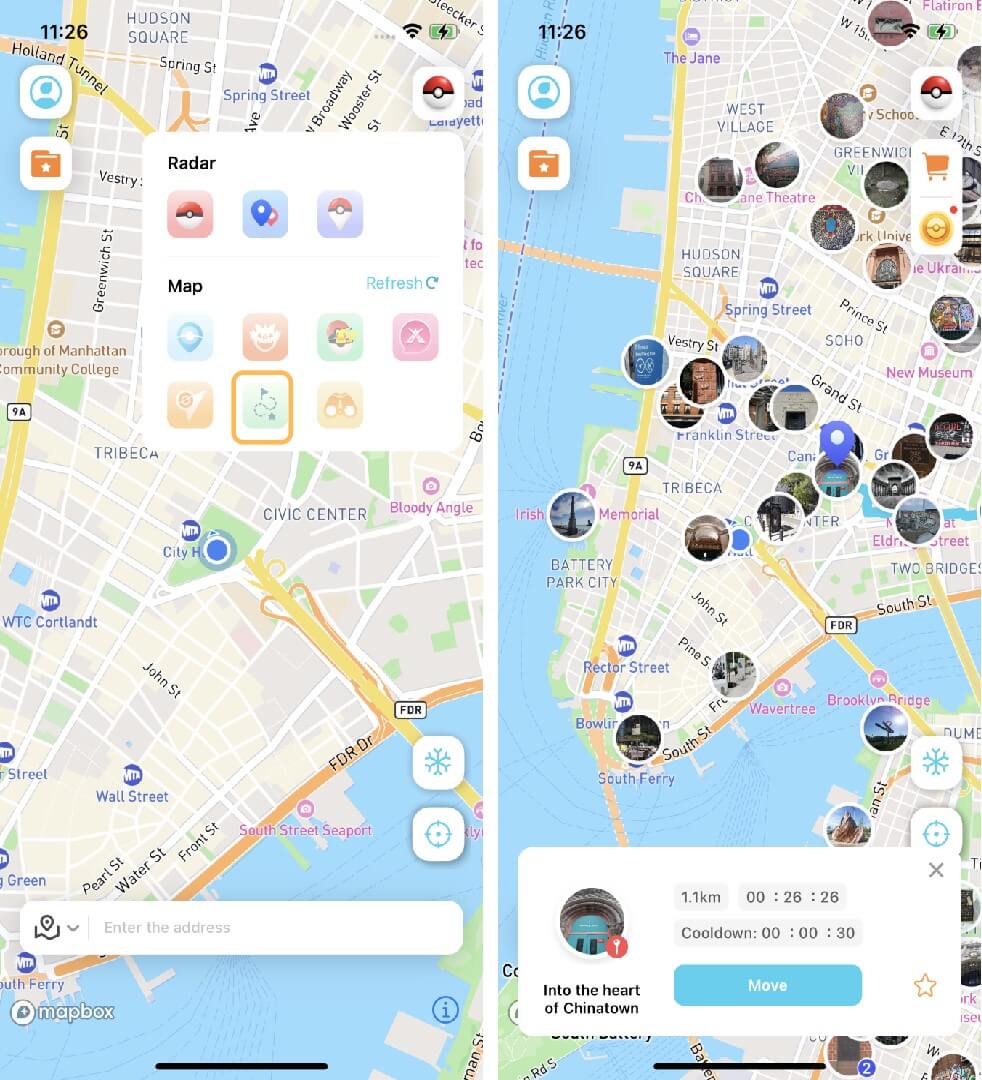
12 View Nearby Route Tasks
You can tap on a route to see more details.
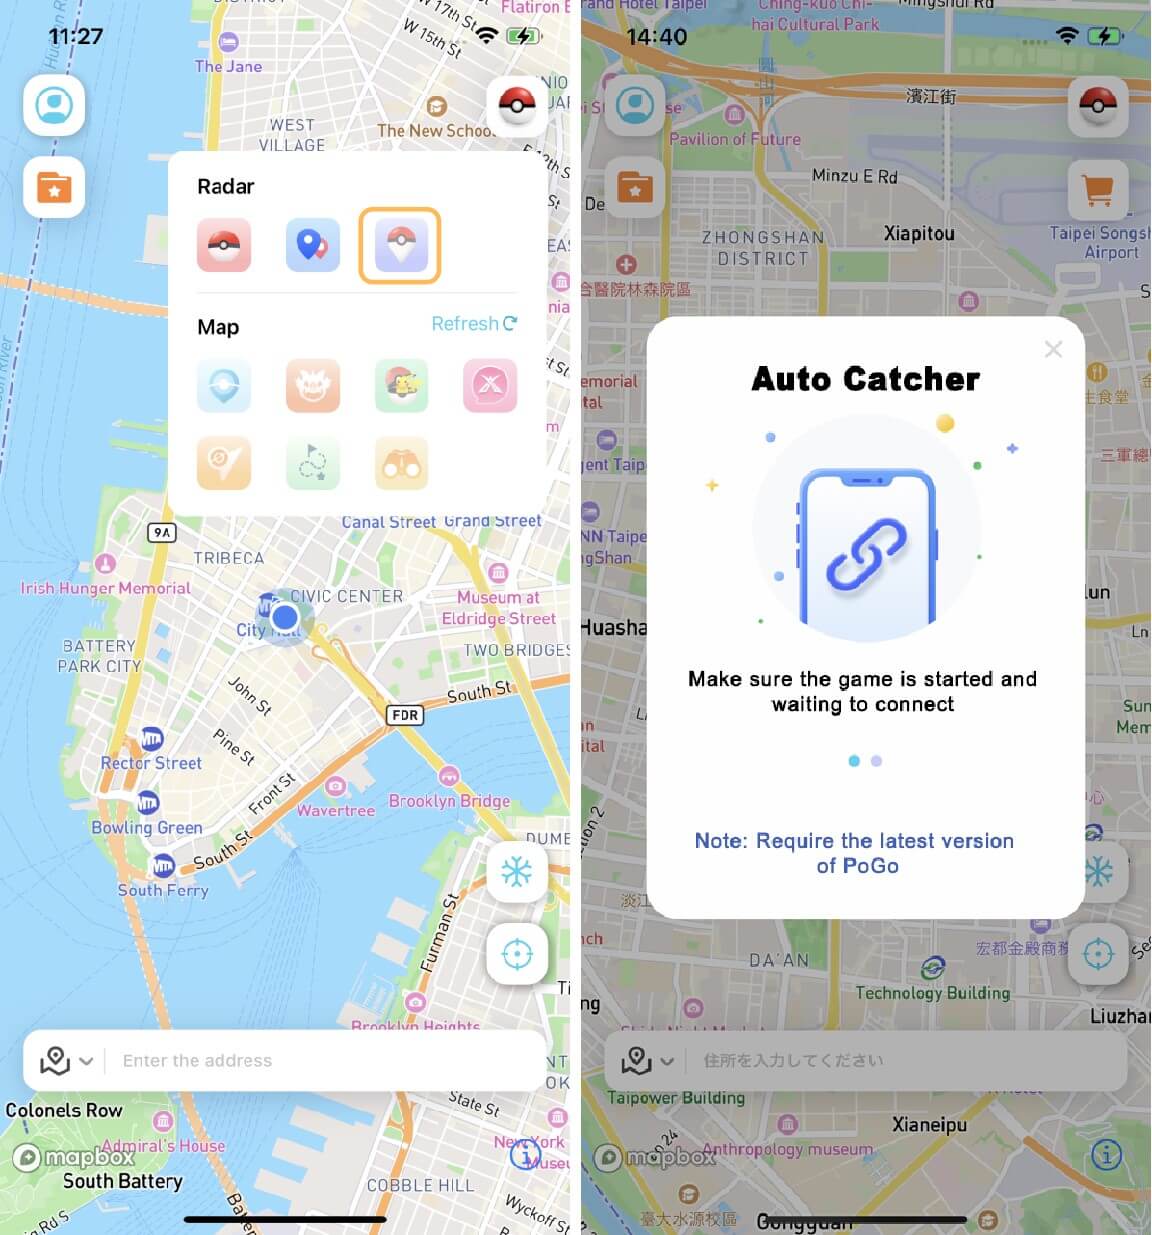
13 Virtual Go Plus
You can auto catch Pokémon and visit PokéStops.
- Launch the latest version of Pokémon GO.
- Tap the Go Plus button and wait for the connection.
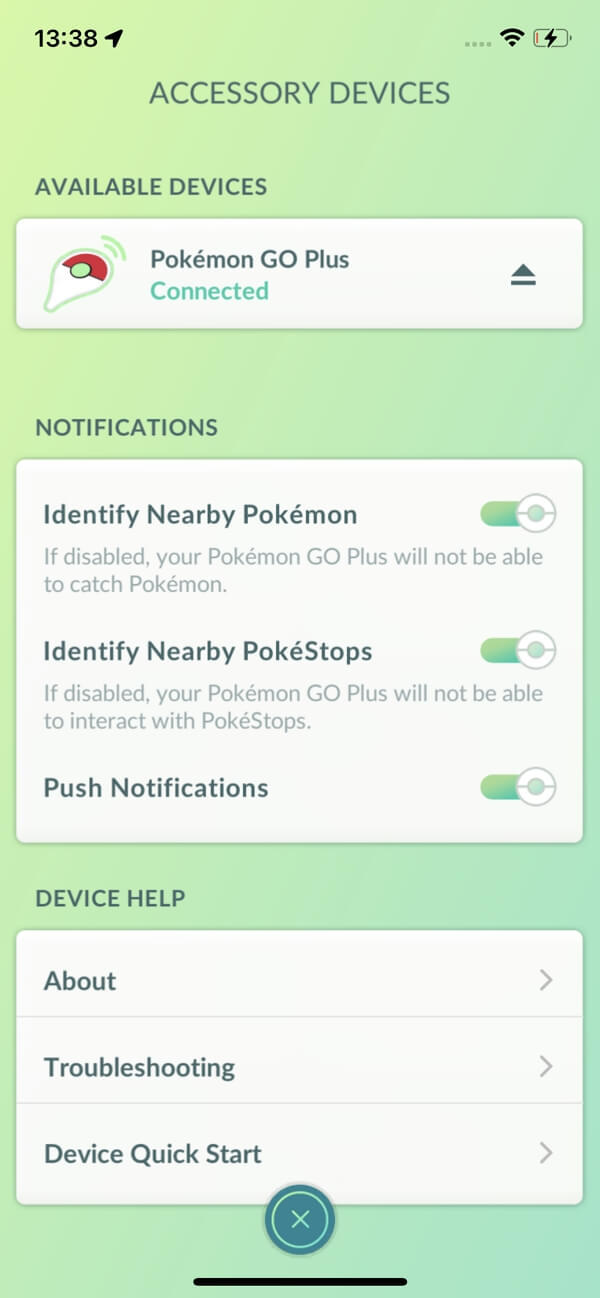
- Complete the Go Plus setup in the game.
- Adjust your location and start auto-catching.